
This might seem like a completely obvious thing to do when you launch your first WordPress website. However, I was setting up one morning to write a new blog post when I received an email from a reader. They asked me how to add a new post in WordPress.
I immediately thought to myself how could anyone be stuck on such a simple step.
I was going to reply, go to posts – add new – and go from there. However, I decided to write a guide on how to add a new post in WordPress.
It’s not like me to not be meticulous so I decided to write a detailed article on all the steps involved in adding a new post in WordPress.
So without further ado, let’s get into…
Navigating the WordPress Dashboard
So when you land on the WordPress Dashboard, things can be intimidating, you’ll see all the different sections and it can be overwhelming. However, forget about everything else, this post is going to focus on adding a new post.
There are two different ways you can get started with a new post.
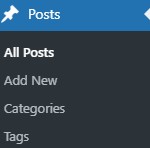
The Posts or All Posts section
When you look at the Dashboard you’ll see the two options. These two options are the exact same. They’ll take you to the same page when you click on them.
On your screen, you won’t see any posts if it’s a new website. The next step is to click on Add New. You will then be taken to the New Post Screen. Check out the image below to get familiar with the New Post dashboard.
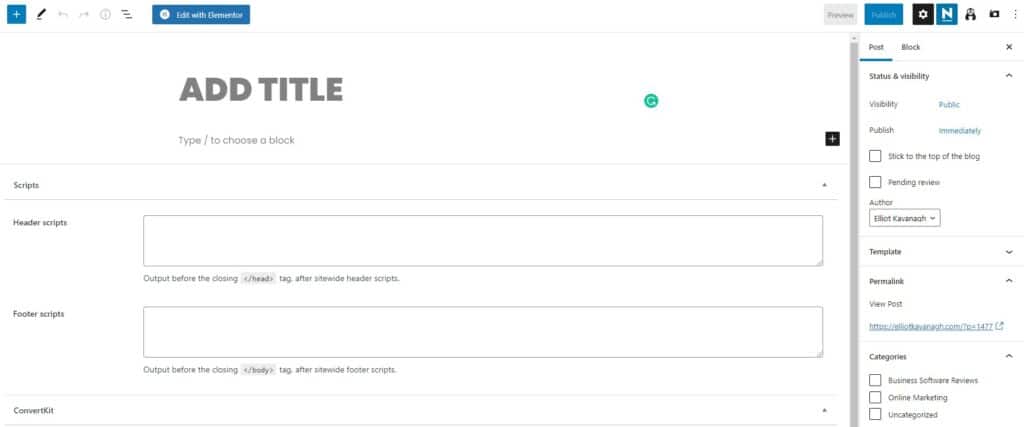
Let’s start with the Add Title section…
Add Title
This is the section where you add the actual title of your post. For example, this post is titled “How to Add a New Post in WordPress”. It appears in search engines as the main title of the post and what the post is primarily about.
Type to choose a block
The block section is where you can add a multitude of different media to your post. If you only want to add text simply click on “Type/ to choose a block” and start typing text. This will default to a paragraph section where you can add as much text as you like.
Getting familiar with this section means learning what blocks are and the different blocks you can utilize. See the image below for a run-down.
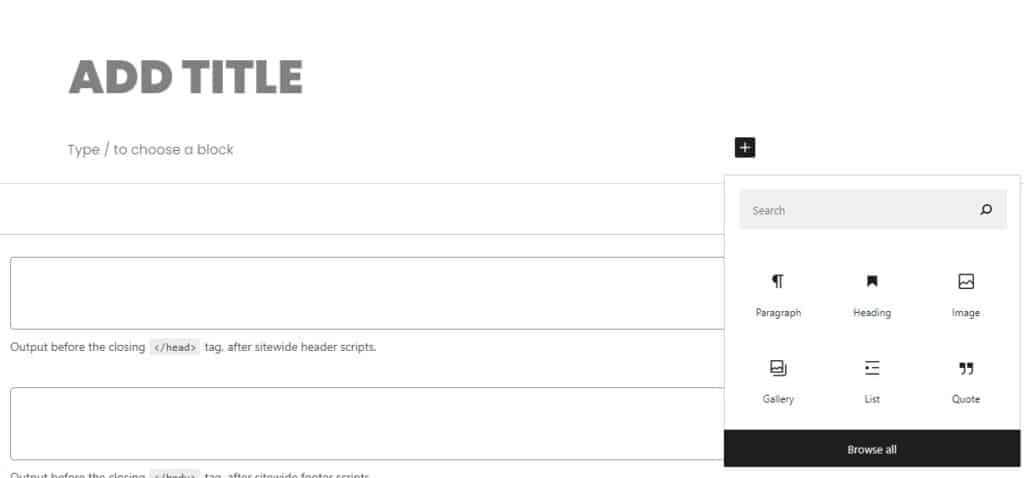
Some of the most common blocks used are:
- Paragraph: the default block that doesn’t need to be selected. Once you start typing WordPress auto selects this.
- Heading: This gives you the ability to select a header for your paragraph. The header normally sums up what the paragraph or section of the text is about. You can choose from H1 to H6 with H1 being the most important.
- Image: This allows you to add an image to your post.
- Gallery: The Gallery block lets users add a gallery of images to their posts.
- List: A list is what you’re reading right now. It lets you add a list of things in bullet point format.
- Quote: The Quote section gives you the option of adding a quote to your post.
You can use click on the “Browse all” button to see all the other options available in the blocks section.
The rest of the editor are areas you will probably never use. You can use them by all means but most of this information will be handled by WordPress itself.
However, there is an area that you should be familiar with.
The WordPress Posts and Block section
This section is important because it allows you to organize your post. This will become more important to you as you have more posts. For example, you can add tags and categories that allow you to find your posts easier.
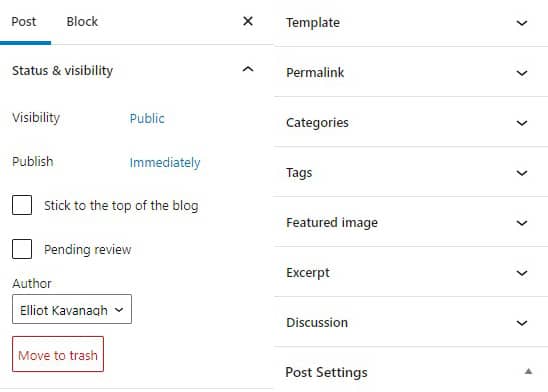
I will go through these features one by one:
Posts:
- Status and Visibility: This section allows you to configure whether the post is public and plan your post if you want it posted at a future date. You can also stick your post to the top of the blog meaning your post will always be visible at the top like a new post would be when you publish it. Here you can also change which author has published the post.
- Template: You can choose the template of the post such as default and other templates unique to your theme.
- Permalink: Here you can change the permalink of your post. You will probably never need to use this section.
- Categories: The category section allows you to select categories for your post. For example, you may have a blog about pets. So an example category would be dogs or cats.
- Tags: Tags allow you to add further categorization to your posts. However, they are not really relevant anymore in terms of Search Engine Optimization.
- Featured Image: You can select which appears at the top of your post and in the thumbnail of your post.
- Excerpt: A short summary of your article which may or may not appear in search results.
- Discussion: The Discussion section allows you to add the ability to comment or allow pingbacks.
Block:
It’s important to note that you will most likely never need this section. However, let’s have a look at what each one does:
- Typography: Here you can adjust the Font size and placement.
- Color: Adjust the color of the font. This is defaulted by your theme and any other editor you may use such as Elementor.
- Drop cap: The Drop cap section tends to be for people with more of a diary-style blog. It makes the first capital letter of the first line large.
- Advanced: Here you can adjust HTML anchor text.
The last step is to hit Publish. That’s it, now your post is live and can be seen and read on the front end of your site.
Other useful tips when adding a new post to WordPress:

- The little encircled “i” icon in the top left of the screen gives you information on your post. Here you can find stats such as how many words, characters, headings, blocks, and paragraphs are in the post.
- You can view a list of all the blocks in your post by clicking on the three bars symbol next to the info symbol mentioned above.
- The left and right arrows allow you to undo or redo any action. This is useful sometimes if you click the wrong button.
That pretty much covers everything in regards to adding a new post in WordPress.
The number one tip I can give you when you’ve started posting on WordPress is to mess around with it as much as possible.
Click on buttons if you don’t know what they do and see what happens. Most of the time it will be a visible change. You can also take a look around the site for more helpful reviews like this.