
When people launch their first site it can be overwhelming to learn all the features of WordPress all at once. Don’t worry because today I will take you through how to add a new page in WordPress.
This is one of the reasons I make these articles for absolute beginners. The WordPress Dashboard can be confusing and when you first look at it, it seems like there’s a lot to it.
We will also go through the most common pages you will need to kickstart your new website.
The WP Dashboard
The WP dashboard is the dark grey board on the left-hand side of the screen when you launch WordPress. You will need to be familiar with this because this is where the magic happens.
This is where you control everything that appears on the front end of your site. Think of the Dashboard as the Settings menu on your phone.
Pages & All Pages
Here is where you can add a new page or view all the pages that you have made already. WordPress and some themes auto-generate pages for you such as a blog and home page.
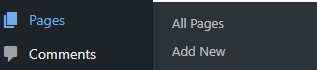
However, I will take you through how to make your own page from scratch.
Let’s start with the all pages option…
This is where you can see your existing pages and overall pages dashboard. Check out the image below if you are lost. This is what you should see when you click on all pages.

However, you may not have any pages yet. That’s fine, I’m going to take you through what all the buttons and menu options do, let’s go.
Starting from the top left
- Add New: Here is where you can add a new page. It will take you to the editor area where you can start working on that page.
- Bulk Options: This drop-down menu allows you to execute bulk actions such as Edit or Move to trash. This is handy when you have a lot of pages. The Apply button simply applies the bulk action.
- All dates: This gives you a drop-down menu so you can search posts by month and year. Hit the Filter button to bring up the search result.
- Search bar: This is a basic search bar that enables you to search anything. Click search pages to run the search.
Add New Button
Clicking the Add New options takes you to the page editor screen which is similar to the post editor. Have a look at the image below for a breakdown of the page’s features:

Starting from the top left…this may look slightly different for you. However, this guide will focus on the features that everyone has.
- Block Inserter: This gives you the option to add any type of block to your page.
- Tools: Choose between a pointer and an Edit option. You most likely will never use this.
- Undo: Go back to a previous version of the page, step by step.
- Redo: Return to the version of the page you just undid.
- Details: See a list of details of the page such as word count, heading count, etc.
- List View: This shows a list of the current blocks on the page.
- Save Draft: Saves a copy of your page to the cloud, WordPress should do this once every minute.
- Add Title: This is the title of the page such as About and Privacy Policy.
- Layout Selection: Here you can choose which layout you want in terms of columns. You can skip this or choose a column before making your page.
Now that you are familiar with the layout and know-how to work the page editor. We will go through three of the most common pages you’ll most likely want on your new site.
Essential Website Pages
There are three essential website pages that you need when launching your new website
- About page
- Privacy Policy
- Cookie Policy
About page
The About page is probably the most common page you’ll see on any website. It tells your readers or visitors who you are. It’s the page where you can tell your story and let people know what you’re about.
You may also see the About page being called About Me, About Us, My Story, History, etc.
Your about page should tell a story, the contents of the about page will be different depending on whether you’re a blogger or company.
My About Me begins with my professional achievements then moves onto a more personal story about how I got to where I am today.
It all depends on how much you are comfortable telling people. You can use mine as a template if you are looking for more of a blogger-style about page.
There are tonnes of ways you can write the about page but here is the general bullet point list of things to include:
- Welcome message: Hi there and welcome to (company name/ blog name)
- What you do/ sell: We’ve been selling … for so many years.
- Values and beliefs: We believe in a customer-centered approach, honesty/ integrity, etc.
- Whos behind the brand: Tell the story of the founders/ starters.
- Best wishes: Enjoy your stay and wish them the best
- Sign off: People usually sign off in a letter style. For example, yours sincerely, faithfully, etc.
Privacy Policy
The privacy policy page is to inform visitors on how you collect data such as their personal information and data. It is to inform visitors on your site about how you collect info such as log data, cookies, security, and third-party software.
I didn’t even write mine because there are plenty of free Privacy Policy generators out there. I used a website called freeprivacypolicy. You just simply log in your information and they generate a page for you.
Cookie Policy
The cookie policy is to inform and educate your visitors on what cookies are and how they are used on your site. It also informs them on how to disable cookies if they wish. Like the privacy policy, I didn’t write my own cookie policy. I used the same website as above, they also have a handy cookie policy generator which you can check out here.