

Sometimes the simplest things can leave you lost. I discovered this very thought the other day while trying to change the favicon on Neve theme.
I’ve been making websites on WordPress for 7 years now and I laugh to myself whenever I get stuck on such as simple step. However, I love when this happens because it always gives me another idea for the content on my website.
So as I got lost looking to change the favicon on Neve WordPress theme. I wrote a note down and said to myself that after I find out how to do it, I’m writing a guide to show everyone else.
If it saves them even 5 minutes of their time. I will consider the guide as helpful.
How To Add A Favicon To The Neve WordPress Theme
First, go to the theme customization, then select the Header options, select “change logo”. When you select “change logo” you will see the option to change the site icon. The site icon is the favicon on Neve WordPress theme. Here you can change the favicon to whatever you want.
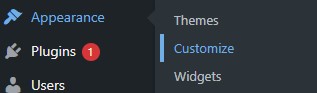
Step 1: Go to Theme Customization
First, head on over to your WordPress Dashboard. Scroll down to Appearance, hover your mouse over it and select customize. This will take you to the Neve theme’s customization options.
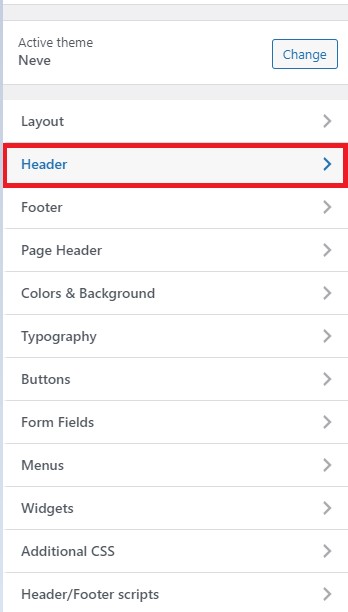
Step 2. Select Header Options
When you are in the theme customization settings, look for the Header option and select it.
Step 3. Change Logo
This will take you to the header options where you will see the option to change the logo. Here you will find the option to change your favicon. Select the option to “Change Logo” and continue to step 4.
Step 4. Change Site Icon(Favicon)
When you select the “Change Logo” option, you will be taken to the logo and site icon options for the Neve theme. The next step is to scroll to the bottom of the menu to find the Site Icon section.
Here is where you change the favicon for your website. Check out the image below for reference.
Select the “select site icon” option, you will then be taken to the media gallery where you can upload or select the image you have chosen to be your favicon.
Preferably, favicons should be images with equal dimensions such as a square box shape. For example, Neve theme recommends the favicon size to be 512 x 512 pixels.
If you’re not sure about what image to use, here are some tips and guidance on how your favicon should be.
Favicon tips
- Make sure the image is a square.
- If you have a mascot, use the mascot as your favicon.
- Keep it simple, favicons are tiny and details generally cant be seen.
- If using a mascot as the favicon, try to keep the image as a PNG so the icon blends into the tab bar.
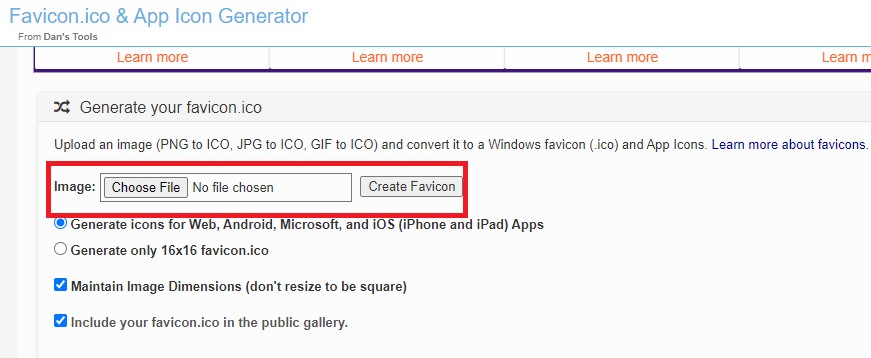
If you already have an image you would like to use. Favicon Generator is a great tool that will turn any square image you have into a favicon.
Head on over, upload your image to the generator, and let it work its magic. After it has generated your favicon, simply download and upload to your WordPress site.
Summary
So there you have it, now you know how to upload a new favicon(site icon) to your WordPress site using the Neve theme.
The great thing is that you now know how to add a favicon on almost every theme on WordPress. It’s pretty much the same process every time.
If you enjoyed the guide make sure to check our more WordPress Guides while you’re here.
Also, if you would love tons of free guides on everything from WordPress to how to make money online, make sure to subscribe below.